With more than 60% of Americans owning their own homes, roofing repairs and improvement projects are in high demand. Many people are now working remotely from home, and the desire for better home maintenance is increasing.
To build the strongest roof possible, start with a thorough inspection of your existing decking. Remove old materials and fix any structural issues. Install moisture barriers like quality underlayment and flashing to prevent leaks. Use overlapping techniques while applying shingles and remember to secure them properly with a nail gun. Opt for durable materials, such as architectural asphalt or metal roofing, which offer longevity and weather resistance. Regular inspections and maintenance are vital to guarantee your roof withstands severe conditions. There’s more to investigate, so consider these factors as you strengthen your roof’s integrity.
Why Roof Strength Starts with a Solid Foundation
To guarantee your roof can withstand the test of time, start by thoroughly removing old materials for a clean slate.
This allows you to inspect the decking for any structural issues that could compromise the strength of your new roof.
As a roofing contractor, it’s crucial to invest in the best possible techniques and tools. Word of mouth is a powerful form of advertising, especially for small business owners.
By investing in the best roofing strategies, you could help your business thrive and grow. Without further ado, let’s take a closer look at how each of the above steps can help you build a better, sturdier, and more satisfying roof.
Removing Old Materials Thoroughly
When commencing a roofing project, thoroughly removing old materials is essential for establishing a solid foundation. This step prevents future issues by allowing proper adhesion of new materials and guarantees the integrity of your roof.
Installing new shingles over old layers can lead to leaks and structural failures.
Consider these key aspects when removing old materials:
- Eliminate all old roofing layers for a clean surface.
- Remove protruding nails to avoid puncturing new shingles.
- Inspect roof decking for damage or rot.
- Ascertain there’s no trapped moisture between layers.
- A complete tear-off minimizes the risk of roof failure.
Inspecting Decking for Structural Issues
After thoroughly removing old materials, the next step involves inspecting the roof decking for any structural issues.
This decking acts as the foundation of your roofing system, directly influencing strength and integrity. Look for signs of rot, warping, or sagging; these conditions can severely compromise load-bearing capacity.
Make sure the decking is securely fastened and free from moisture damage, as weakened areas can lead to leaks and potential structural failures.
It’s also vital to check for proper alignment and levelness—uneven surfaces can cause improper shingle installation and increase the risk of water pooling.
Regular inspections, especially after severe weather, are essential to identify weaknesses early and prevent costly repairs down the line.
Installing Layers That Shield Against Moisture
When installing your roof, start with a drip edge and quality underlayment to create a solid barrier against moisture.
Pay close attention to the valleys, where ice and water barriers are essential for effective drainage and leak prevention.
Drip Edge and Underlayment Essentials
To guarantee your roof offers maximum protection against moisture, installing a drip edge and underlayment is essential. The drip edge prevents water from running down your fascia boards, safeguarding the underlying wood. Secure it with nails every couple of feet before applying the underlayment.
Consider these key points for effective installation:
- Apply underlayment flat and straight for peak performance.
- Use self-sticking underlayment in warmer conditions for better adhesion.
- Add extra nails in cooler temperatures for stability.
- Roll out felt paper in overlapping sections to enhance fire ratings.
- Secure all materials thoroughly to create a watertight barrier.
Proper Use of Ice & Water Barriers in Valleys
Installing a drip edge and underlayment sets the stage for a robust roofing system, but adding ice and water barriers in the valleys takes moisture protection to the next level.
These self-adhering membranes are essential for sealing around nails and fasteners, preventing leaks caused by melting snow and ice accumulation. When you install the barriers, overlap them by at least 6 inches to guarantee a continuous shield against moisture.
Extend the barriers from the eaves up to at least 24 inches inside the exterior wall line to combat water back-up during heavy rains or snow melt. Properly installed ice and water barriers can greatly extend your roof’s lifespan by preventing rot and mold growth in the underlying structures.
How to Lay Shingles for Maximum Protection
When laying shingles, start with starter shingles at the base to create a reliable water barrier, ensuring no moisture seeps through.
Use an overlapping pattern for each subsequent layer, which is essential for maintaining a watertight seal.
Don’t forget to cap the ridge and seal exposed nails to enhance durability and protect your roof from potential leaks.
Starter Shingles and Overlapping Patterns
While laying shingles, utilizing starter shingles and an overlapping pattern is essential for creating a waterproof barrier that guards against leaks. Starter shingles provide a vital first row, sealing seams at the roof’s base.
To maximize protection, follow these guidelines:
- Apply starter shingles to establish an effective water barrier.
- Use overlapping patterns to guarantee each shingle covers the nails of the row below.
- Stagger seams to minimize leak risks.
- Secure shingles with a nail gun for efficiency and accuracy.
- Align shingles meticulously for a uniform appearance and enhanced durability.
Why Ridge Capping and Nail Sealing Matter
Ridge capping and nail sealing are critical components in ensuring your roof’s longevity and protection against the elements. By placing specialized shingles at the roof’s peak, ridge capping enhances waterproofing and guards against wind uplift, greatly boosting durability.
It’s crucial to use longer nails during installation to secure multiple layers tightly, preventing potential leaks. Equally important, nail sealing with a high-quality hybrid sealant prevents water intrusion, as standard options often fail under harsh conditions.
The overlapping shingle pattern you use, combined with starter shingles, forms a robust water barrier at both the base and ridge. Regular inspections of ridge caps and nail seals can help identify weaknesses early, ultimately extending your roof’s lifespan and performance.
Critical Components That Extend Your Roof’s Life
To extend your roof’s life, you need to prioritize effective flashing and ventilation systems.
Proper gutter placement and water management are equally essential in preventing moisture-related issues that can compromise your roof’s integrity.
Flashing and Ventilation Best Practices
Although neglecting flashing and ventilation might seem harmless, properly installed flashing around chimneys, vents, and roof valleys is essential for preventing leaks and ensuring water flows away from vulnerable areas.
Quality flashing materials like aluminum or copper enhance your roof’s durability against corrosion. Moreover, a balanced ventilation system helps regulate attic temperature and moisture, protecting your roofing materials and insulation.
To optimize your roof’s lifespan, consider these best practices:
- Install flashing at all critical junctions
- Use durable materials for flashing
- Incorporate ridge and soffit vents for airflow
- Regularly inspect flashing and ventilation systems
- Maintain the balance of intake and exhaust ventilation
Gutter Placement and Water Management
Proper gutter placement plays an essential role in managing water effectively, ensuring it flows away from your roof and foundation.
To optimize water management, aim for a minimum slope of 2% in your gutters, which helps prevent clogs and overflow. Install downspouts at regular intervals—every 30-40 feet—to distribute water load and reduce stress on any single section of your gutter system.
Utilizing gutter screens or guards can further enhance efficiency by keeping debris out, allowing for uninterrupted water flow.
Don’t forget to conduct regular inspections and maintenance; cleaning and checking for leaks can greatly extend both your roof’s lifespan and the overall integrity of your home.
Prioritize these elements to safeguard your investment.
Upgrading Your Roof Materials for Longevity
When considering an upgrade to your roof, opting for high-performance shingles or metal roofing can greatly enhance durability and longevity.
These materials not only withstand extreme weather but also require less frequent maintenance, saving you time and money in the long run.
Furthermore, consider LP SmartSide for its resilience, which can further protect your home from the elements while providing a modern aesthetic.
Choosing High-Performance Shingles or Metal Roofing
Choosing the right roofing material is essential for ensuring the longevity and durability of your home. High-performance shingles and metal roofing are excellent options that provide exceptional benefits.
Here’s why you should consider them:
- Durability: Architectural asphalt shingles last 30+ years.
- Lifespan: Metal roofing can endure for 40-70 years.
- Energy Efficiency: Reflective metal roofs can cut cooling costs by up to 25%.
- Protective Features: Impact-resistant shingles and zinc-coated metal enhance weather protection.
- Warranties: Many high-performance materials come with extended warranties for peace of mind.
Considering LP SmartSide for Better Resilience
As you consider upgrading your roofing materials for longevity, LP SmartSide emerges as a compelling option due to its impressive resilience.
Engineered with a proprietary SmartGuard process, it offers superior resistance to moisture, termites, and fungal decay, allowing you to build a strong roof that lasts.
With a 50-year limited warranty, LP SmartSide remarkably outlasts traditional wood products, ensuring you won’t have to worry about frequent replacements.
This material can withstand extreme weather, including high winds and heavy rains, providing exceptional protection for your home.
Plus, it’s available in various styles and textures, so you can achieve aesthetic appeal without sacrificing durability.
Treat your roof to LP SmartSide for lasting performance and visual integrity.
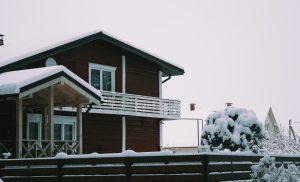
Moving to Wisconsin? Here’s Why Roof Strength Matters
If you’re considering a move to Wisconsin, understanding the importance of roof strength is essential. The harsh winters, heavy snowfall, and strong winds mean your roof system must be robust. A new roof designed to withstand up to 50 pounds per square foot is necessary for safety and structural integrity.
Here are key reasons why roof strength matters:
- Protects against heavy snow loads
- Resists weather-related wear and tear
- Enhances energy efficiency through proper insulation
- Increases property value in a competitive market
- Guarantees safety and peace of mind
Investing in high-quality materials like Reinforced Cement Concrete (RCC) can provide durability and long-lasting protection for your home, making your new roof a critical aspect of living comfortably in Wisconsin.
Ready to Follow the Steps To Make The Strongest Roof Possible?
To guarantee you create the strongest roof possible, start by laying a solid foundation with properly constructed columns, beams, and walls that comply with local building codes. This structural stability is essential before you move on to the roof.
Use durable materials for shuttering, making sure it can adequately support the weight of the concrete slab. Incorporate steel reinforcement by placing a mesh of steel bars in proper alignment, as this greatly enhances the roof’s strength.
When mixing and applying high-quality concrete with waterproofing compounds, make sure an even application and allow for proper curing over 2-3 weeks.
Regularly inspect your roof for cracks or drainage issues, and maintain all components to provide adequate long-term durability and structural integrity.